Raspberry Pi 5 Guide
Raspberry Pi OS installation
Raspberry Pi OS is the official operatving system for the Raspberry Pi series, based on Debian Linux, and is widely used for programming and robotics projects due to its ease of use and its wide support [1]. Next, we detail the steps needed to install it in a Raspberry Pi:
- Download the Raspberry Pi OS image from the official site Raspberry Pi OS.
- Copy the image and paste it into a microSD card using a software like Balena Etcher or Raspberry Pi Imager.
- Insert the microSD card into the Raspberry Pi and turn it on.
- Configure the Raspberry Pi following the on-screen instruction, including connecting to a Wi-Fi network and the account creation.
- Update the operating system running the following commands in the terminal:
bash
   sudo apt update
   sudo apt upgrade
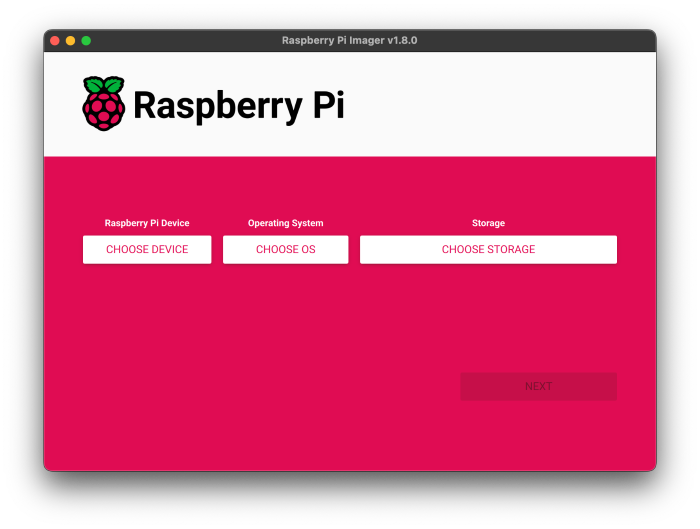 Raspberry Pi Imager
Important
Due to personal experience, we recommend configuring the official application from Raspberry Pi for remote connection, Raspberry Pi Connect, which allows to access the Raspberry Pi anywhere without the need to be connected in the same wifi network [2]. In our case, it allowed us multiple times, remotely, through the Remote Shell mode, to kill processes that have resulted in crashed or have limited the response time from the Raspberry Pi.
Camera Installation
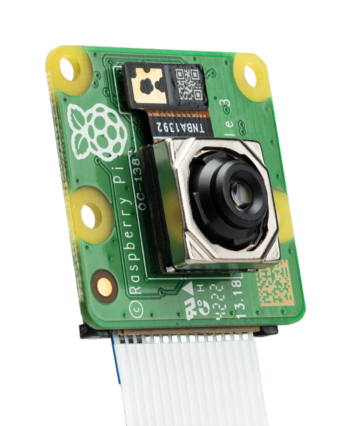 Raspberry Pi Camera Module 3
To install the camera in the Raspberry Pi, it is needed to follow these steps. It is worth mentioned that the camera used in this project is the Raspberry Pi Camera Module 3 Wide, which is compatible with the Raspberry pi 5 and allows to capture high-quality images and videos [3].
- Connect the camera to the Raspberry Pi using the CSI connector.
- Check the proper working of the camera by running the following command in the terminal:
bash libcamera-hello - If the camera works correctly, a preview of the camera will be shown on screen for a few seconds.
Important
In case you are interested in acquiring any of the Raspberry Pi Camera, it's needed to buy a separate cable depending on the supplier, normally, these cameras come with the Raspberry Pi 4 cable, which is incompatible with the Raspberry Pi 5.
Raspberry Pi AI HAT+ Installation
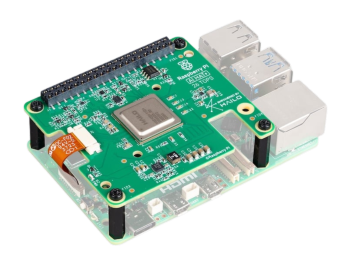 Raspberry Pi AI HAT+ 26 TOPS
To install it, we used both guides from the Raspberry Pi official documentation, where it is explained how to install the Hailo AI HAT+ [4] and how to install the software required for its operation [5].
- Check the Raspberry Pi 5 is up-to-date, if not, update it with the following command:
bash sudo apt update && sudo apt full-upgade - Check the installed firmware version with the following command:
bash sudo rpi-eeprom-update- If said command returns a date earlier than December 6th, 2023, its needed to update the Raspberry Pi 5's firmware. To do this, we run the following command:
bash sudo raspi-config - In the configuration menu, select the option
Advanced Optionsand thenBootloader Version. Choose the optionLatestand exit the configuration menu.
- If said command returns a date earlier than December 6th, 2023, its needed to update the Raspberry Pi 5's firmware. To do this, we run the following command:
- Execute the following command to update the firmware:
bash sudo rpi-eeprom-update -a - Reboot the Raspberry Pi 5 with the following command:
bash sudo reboot - Unplug the Raspberry Pi 5 and disconnect all the devices connected to it.
- Install the spacers on the Raspberry Pi 5 using the four screws provided. Press firmly the GPIO connecter stacked over the Raspberry Pi GPIO connector. Disconnect the flat cable from the AI HAT+ and connect the other end to the Raspberry Pi's PCIe port. Lift the flat cable's support from both sides, then insert the cable with the copper contact point inside, to the USB ports. With the flat cable completely inserted in the PCIe port, push the cable's support down from both sides to lock the flat cable firmly in its place.
- Put the AI HAT+ over the spacers and use the four screws remaining to lock it in its place.
- Connect the flat cable to the AI HAT+ and secure it. To do so, lift the flat cable's support from both sides, then insert the cable with the copper contact point inside, to the USB ports. With the flat cable completely inserted in the PCIe port, push the cable's support down from both sides to lock the flat cable firmly in its place.
- Plug the Raspberry pi 5 back in and turn on the device.
- To enable PCIe Gen 3.0 speeds [6], run the following command:
bash sudo raspi-config- In the settings menu, select the option
Advanced Optionsand thenPCIe Speed. Choose the optionYesto enable PCIe Gen 3.0 mode. - Reboot the Raspberry Pi 5.
- In the settings menu, select the option
- Install the dependencies required to use the NPU. Run the following command from a window in a terminal.
bash
    sudo apt install hailo-all
It is worth noting that, because the latest version (4.21.0) was very recent at the time, we recommend using the 4.20.0 version, since we worked and tested its proper functioning on this version, to do so, instead of running the previous command, run:
bash
    sudo apt install hailo-all=4.20.0
This will install the following dependencies:- Hailo kernel device driver and firmware
- HailoRT middleware software
- Hailo Tappas Core Post-Processing Libraries
- Hailo rpicam-apps post-processing demo software stages
- Finally, reset the Raspberry Pi again so these changes take effect
- To check the NPU is properly installed and working, run the following command:
bash
    hailortcli fw-control identify
If the NPU is installed correctly, you should see a message similar to this:
bash
    Executing on device: 0001:01:00.0
    Identifying board
    Control Protocol Version: 2
    Firmware Version: 4.20.0 (release,app,extended context switch buffer)
    Logger Version: 0
    Board Name: Hailo-8
    Device Architecture: HAILO8
    Serial Number: <N/A>
    Part Number: <N/A>
    Product Name: <N/A>
Raspberry Pi Configuration
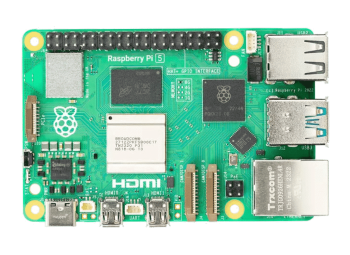 Raspberry Pi 5
To configure the Raspberry Pi, first connect the Raspberry Pi to a monitor, mouse and keyboard.
Then, turn on the Raspberry Pi and wait until the operating system starts.
After, open a terminal and execute the following command to update the operating system:
sudo apt update && sudo apt upgrade -y
Clone the repository in case you haven't done so. You can see the multiple ways of cloning the repository in this section GitHub.
Navegate to the cloned repository's directory, in case its cloned in the Documents folder, the command would be:
cd ~/Documents/klevor
Change the current directory to devices/raspberry_pi_5 to access the code used for the Raspberry Pi 5:
cd devices/raspberry_pi_5
Configure Python's virtual environment. To do so, run the following command:
- If the operating system is Windows:
cmd python -m venv .venv .\.venv\Scripts\activate - If the operating system is Linux or macOS:
bash
    python3 -m venv .venv
    source .venv/bin/activate
Install the required dependencias for the project running the following command:
pip install -r requirements.txt
In case the Raspberry Pi Pico 2 W isn't configured, it is recommended to follow its respective Configuration Guide to be able to use it as the robot's controller. In the same way as, if the object detection model isn't generated yet, it is recommended to follow the Model Creation Guide to be able to use it with the Raspberry Pi 5.
Configure the Startup Service
To be able to make sure the robot starts automatically by just turning the Raspberry Pi on, its required to configure a Startup Service
To do so, first check the Shell script run.sh is executable, to which, run the following command:
chmod +x run.sh
Note
You need to be inside of the devices/raspberry_pi_5 directory so the previous command works.
After, we create a service file inside the directory /etc/systemd/system with the name klevor.service with the following command:
sudo nano /etc/systemd/system/klevor.service
In the text editor, paste the following command:
[Unit]
Description=Klevor Startup Service
After=multi-user.target

[Service]
User=pi
ExecStart=/home/pi/Documents/klevor/devices/raspberry_pi_5/run.sh
WorkingDirectory=/home/pi/Documents/klevor/devices/raspberry_pi_5
StandardOutput=inherit
StandardError=inherit
Restart=on-failure

[Install]
WantedBy=multi-user.target
Note
Replace user with the user name in the Raspberry Pi, which by default is pi. Also, replace /home/pi/Documents/klevor/devices/raspberry_pi_5/run.sh with the complete route to the script run.sh which is located inside of the cloned repository's directory. Also, adjust the route from the WorkingDirectory with the location of the run.sh script directory is located in.
Save the changes and exit the text editor (in nano, press Ctrl+X, and then Y to confirm the chagnes, and finally Enter).
Then, reload the system's services with the following command:
sudo systemctl daemon-reload
Finally, enable the service to start automatically whenever the Raspberry Pi starts with the following command:
sudo systemctl enable klevor.service
Note
If you need to stop the service, you can do so with the following command:
bash
sudo systemctl stop klevor.service
Reboot the Raspberry Pi to make the changes take effect. From now on, the robot will start automatically whenever the Raspberry Pi is turned on.
Important
Due to the code's logic, the robot will not move until a button or switch is pressed, as it is shown on the robot's connections diagram. This is to prevent the robot accidentally moving after turning on the Raspberry Pi. You can view the connecting diagram in the Electronics section.
Important
If you think the robot did not start correctly, you can check the service's status with the following command:
bash
sudo systemctl status klevor.service
Also, you can execute the code directly without configuring the startup service, to do so, simply run the following command:
bash
run.sh
This will start the robot and it will start to print the debugging messages in the terminal. If everything works correctly, you should see messages indicating that the robot is ready to receive commands.
If you wish to stop the robot, you can press Ctrl + C in the terminal where the script run.sh is being run on.
References
-
Raspberry Pi OS. (2025). Raspberry Pi. https://www.raspberrypi.com/software/
-
Raspberry Pi Connect. (2025). Raspberry Pi. https://www.raspberrypi.com/documentation/remote-access/raspberry-pi-connect.html
-
Camera. (2025). Raspberry Pi. https://www.raspberrypi.com/documentation/computers/camera.html
-
AI Kit and AI HAT+ software. (2025). Raspberry Pi. https://www.raspberrypi.com/documentation/computers/ai.html#getting-started
-
AI Hat+. (2025). Raspberry Pi. https://www.raspberrypi.com/documentation/accessories/ai-hat-plus.html#ai-hat-plus
-
Raspberry Pi. (2025). Raspberry Pi. https://www.raspberrypi.com/documentation/computers/raspberry-pi.html